What did you do to your Bronco Raptor today?

I used a cup holder from the rear seat of a Lincoln Corsair and lights from a Ford Escape. I had to change the plug on the JHForman harness to fit the lights I used (needed to be male instead of female). The cup holder had to be cut and modified to work along with a little trimming on the under side of the center console. Took some time to get everything flush and fitting properly. Original cup holder can still be put back if wanted as most of the trimming was on the cup holder.
Dang, nicely done sir! Thanks for the info 😬
 
I used a cup holder from the rear seat of a Lincoln Corsair and lights from a Ford Escape. I had to change the plug on the JHForman harness to fit the lights I used (needed to be male instead of female). The cup holder had to be cut and modified to work along with a little trimming on the under side of the center console. Took some time to get everything flush and fitting properly. Original cup holder can still be put back if wanted as most of the trimming was on the cup holder.
By any chance do you remember the part numbers for all the parts?
 
By any chance do you remember the part numbers for all the parts?
Under seat lights: Part #: ML3Z14A318J
Cup Holder: Part #: LJ7Z7813562BA
Cup Holder Lights: Part #: LJ6Z7813562FA This is an entire cup holder assembly with the lights. I just used the lights as it was only $17 total and the just the lights by themselves were $50.
 
Under seat lights: Part #: ML3Z14A318J
Cup Holder: Part #: LJ7Z7813562BA
Cup Holder Lights: Part #: LJ6Z7813562FA This is an entire cup holder assembly with the lights. I just used the lights as it was only $17 total and the just the lights by themselves were $50.
1693145087637.gif
 
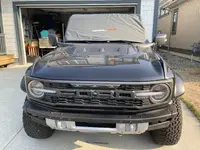
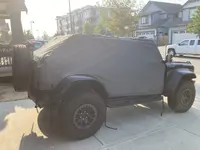
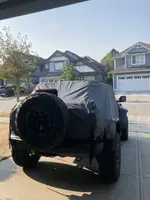
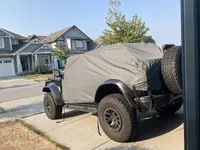
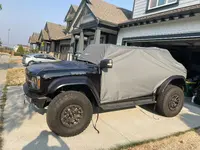
I used my new Broncover for the first time last night. Very easy to put on and did a great job keeps everything buttoned up even though I had the doors off and tube door on. Kept everything snug and dry. No dew in the morning and ready to tackle the day.
 

Attachments

  • IMG_4105.jpeg
    IMG_4105.jpeg
    351.8 KB · Views: 30
  • IMG_4104.jpeg
    IMG_4104.jpeg
    382.3 KB · Views: 31
  • IMG_4103.jpeg
    IMG_4103.jpeg
    381.6 KB · Views: 31
  • IMG_4102.jpeg
    IMG_4102.jpeg
    230.3 KB · Views: 32
  • IMG_4101.jpeg
    IMG_4101.jpeg
    165.9 KB · Views: 32
Love to see some after photos once you have color matched the fender. Thinking about doing the same with my Iconic Silver Raptor.
He posted a little further down in this thread, BTW they look great but sounds like a challenge to get the paint match.

 
He posted a little further down in this thread, BTW they look great but sounds like a challenge to get the paint match.

Exactly. With as much light as the flares reflect you almost have to pick your battle on the color shade with a light metallic color...should be interesting to see how the factory flares are this next year
 
The 20" light bar is connected to AUX6. The Rigid 3x3 rear lights are connected to AUX2. Of course, AUX1 is the front off-road lights. The winch is a direct wire to the battery; the control is via the provided 20'
The 20" light bar is connected to AUX6. The Rigid 3x3 rear lights are connected to AUX2. Of course, AUX1 is the front off-road lights. The winch is a direct wire to the battery; the control is via the provided 20' cable.
A little help as I’m trying to do almost the same thing and I’m having trouble figuring out the wiring. My rear bumper lights are going to hook to the wire behind the rear passenger panel correct? Then at point I’m unsure which wires to connect to behind the glove box and then under the hood to make it work. My 20 Inch front bumper light bar and front bumper lights I have the wires run up into the engine compartment. I see one of the wires to hook up to right there at the middle of the radiated area. I’m guessing I use that for the bumper lights but do I need to hook anything else up after that to get them to work? And lastly the 20 inch light bar has some pretty thick wires and even came with its own relay and switches which I don’t want to use so can I hook that up to one of the wires under the hood and which one should I use and are there any other connections to be made other than ground the negative wires.
 
The 4 lights on the bumper; used the Baja Design universal harness. I didn't want to use the toggle switch it came with so I modified it to work with my uplifter switches. Still waiting for the Bronco S-pod to come out. The install was pretty straight forward.
The LP6 lights have options for Hi Low and daytime. It could easily use 4 switch locations. I tied the lo beams on one wire to switch 3 as the 4 lights together had a higher amp requirement. Wired the daytime option to one of the lights on the grill. The hi beams are on a relay so for now they are using switches 2 & 4 as a trigger.
The Fog Lights are wired into the factory fog switch. I used the factory jumper wire which allowed me to not modify the factory wiring. Just a $15 cost to replace not that I would ever go back.
The 3rd light next to the fogs are wired to Switch #1 which was wired there already.
The Pillar lights are wired with harness that came with the lights.

Im a bit OCD so there was a bit of time spent to make sure my wiring was completely stealth. As if it was all factory. Once again when the S-pod is available Ill have more room for my chase and rear lights.
At that point the few wires that I could not make visually disappear will get redone.
I have utilized the last available uplifter for the ARB Air Compressor installed with the AGS Off Road spare tire mount. I was really happy with their kit. Customer service with both Baja Design & AGS Off Road above ad beyond!!!

I can answer more specifics if you need. feel free to ask any questions...
So I need a little more detail. My rear bumper lights will hook to the wire behind the rear passenger panel in the back. I got that but then what wires behind the glove box get hooked up and then under the hood to complete the circuit besides ground? And what uplifter switch would that be. Second, my front bumper lights and my 20 inch bar lights. I have the wires coming up into the engine compartment. I see a wire near the center of the radiator I’m guessing I can hook the bumper lights to. Any other connections beside that to complete the circuit besides ground. What switch would that be then. And lastly my 20 inch bar lights. Big wires coming off that thing and I don’t want to have to use their switch and relay. Can I run those wires to one of the under hood wires and which one to complete the circuit. I can do the wiring and soldering ( everything is soldering to this point with shrink tube around it) but figuring out connections to the other wires is where I get lost.
 
I think this should answer most of your questions.

however…. The Raptor uses Aux1 switch for the extra fogs using a 10 amp circuit and moves the 30 amp circuit to Aux 3. All this is detailed in your owners manual.

good luck!

 
A little help as I’m trying to do almost the same thing and I’m having trouble figuring out the wiring. My rear bumper lights are going to hook to the wire behind the rear passenger panel correct? Then at point I’m unsure which wires to connect to behind the glove box and then under the hood to make it work. My 20 Inch front bumper light bar and front bumper lights I have the wires run up into the engine compartment. I see one of the wires to hook up to right there at the middle of the radiated area. I’m guessing I use that for the bumper lights but do I need to hook anything else up after that to get them to work? And lastly the 20 inch light bar has some pretty thick wires and even came with its own relay and switches which I don’t want to use so can I hook that up to one of the wires under the hood and which one should I use and are there any other connections to be made other than ground the negative wires.
Correct [E]; white w/ orange stripe wire, which terminates at the firewall (passenger front). You will need to connect to a wire [B1 or B2] through the firewall and over to the driver's side in the engine compartment. Then connect [B1 or B2] to the desired AUX wire [2]. Use the diagram to determine which wire to connect to which switch based on the amperage.

1684388912091-png.8255
1694199239278.png


Nope, once connected to the lead in the engine compartment you are done. Flip the AUX switch and check your work.
 
Last edited:
Correct [E]; white w/ orange stripe wire, which terminates at the firewall (passenger front). You will need to connect to a wire [B1 or B2] through the firewall and over to the driver's side in the engine compartment. Then connect [B1 or B2] to the desired AUX wire [2]. Use the diagram to determine which wire to connect to which switch based on the amperage.

1684388912091-png.8255
View attachment 9881

Nope, once connected to the lead in the engine compartment you are done. Flip the AUX switch and check your work.
Great advice. One more thing, make sure your grounds are well grounded. Hit whatever you are grounded to with some sandpaper. Sure that’s obvious, but I didn’t for my light bar, the bar worked perfectly on test then intermittently thereafter and then I had to pull the visor and related trim to go back and do it right.
 
Step by Step
  1. Get an OBD2 scan tool.
  2. Download and install FORscan software
    • If you need help understanding FORscan checkout this link
  3. Go to Bronco6G and download spreadsheet of FORscan codes
  4. How to make changes:
    1. Turn BR accesory power on (do not need to start engine)
    2. Plug in OBD2 scanner
    3. Bring up FORscan app
    4. Sync FORscan with OBD2 scanner
    5. Select the module to be modified
    6. Make desired change
    7. Follow screen instructions
    8. Turn BR power off then back on
    9. I generally verify the changes then test the system to see if the change actually worked
  5. Done - enjoy mod(s)
FYI, the auto start-stop code change in the PSCM module does not work on MY23. I programmed the auto start-stop to be part of the myRaptor mode button on the steering wheel; that works flawlessly. Or, just push the dash button.
Thanks!
 
Correct [E]; white w/ orange stripe wire, which terminates at the firewall (passenger front). You will need to connect to a wire [B1 or B2] through the firewall and over to the driver's side in the engine compartment. Then connect [B1 or B2] to the desired AUX wire [2]. Use the diagram to determine which wire to connect to which switch based on the amperage.

1684388912091-png.8255
View attachment 9881

Nope, once connected to the lead in the engine compartment you are done. Flip the AUX switch and check your work.
Is B1 and B 2 marked? Does it matter which one I use. So I’m going to install rigid roof lights as well as soon as my wiring is done here. So am I correct in assuming if I install the rear bumper lights to B1, then can connect the roof lights to a wire behind the glove and then to B2?
 
Is B1 and B 2 marked? Does it matter which one I use. So I’m going to install rigid roof lights as well as soon as my wiring is done here. So am I correct in assuming if I install the rear bumper lights to B1, then can connect the roof lights to a wire behind the glove and then to B2?
No, see color code
No, use either one
Yes
 
I installed the DV8 storage box. It said specifically that it would not fit the Raptor but it fit with not modification. I chose to modify the piece in the center. Worked well. My use was to install a Kenwood 110W radio. but if someone needed some extra space its a great item! FYI the sound skins is a great improvement!

032DF1E4-964C-431B-A5B8-B0186321EF13_1_105_c.jpeg
620A4407-7186-4716-B4F0-3E39DC303077_1_105_c.jpeg
Screenshot 2023-09-08 at 6.46.22 PM.png
 

Top Member Reactions

Back
Top