UPR Braptor Catch Can Development! Let’s GOOOOO!

Sounds good, and of course, anytime!

As far as of right now, we do not have plans to attend the Bronco Super Celebration, since we will be at Ponies in the Smokies (Mustang Oriented) at the end of this month (3/22-25), which takes place throughout various locations in Tennessee. Of course, if things change and we do, we will certainly announce it!

 
Thanks Joe.
 
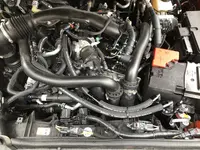
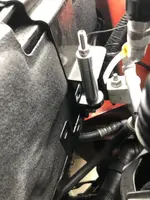
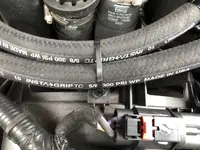
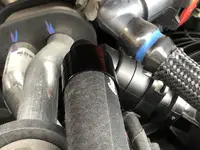
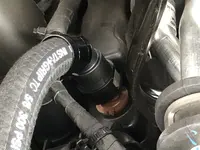
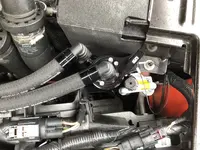
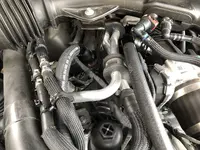
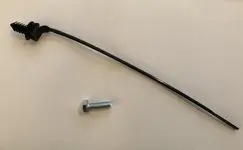
Installed the UPR single valve oil catch can, and after trying numerous hose routings, fittings, and orientation I decided to share my findings. The UPR recommended Catch Can location and mounting hole offers the best clearance and serviceability. I did however, need to remove the 4 silver set screws in the top that hold the catch can to the bracket and rotate the can so that the outlet was close to the battery. This orientation keeps the hoses somewhat parallel, tucked lower, and maintains the factory clearance to the hood insulation. This routing also prevents the catch can hoses from contacting the air intake tubing to avoid the possiblity of transferring increased temps to the intake tubing. When I routed the hoses over the top of the air intake tubes it left minimal clearance to the bottom of the hood insulation pad. I also purchased 2 additional 5/8" x 90 degree quick release fittings H5032-88 from UPR for ease of hose routing replacing the 2 45 degree fittings that came on the hoses in my kit. Note that you can twist the hoses once installed to assist them in naturally laying in the desired position. Since the inlet hose was near the fan shroud I added a 1" wire loom clip retainer into the existing 1/4" hole in the shroud, this provides a little additional support to the hose and catch can. This routing does have the intake hose over the oil filter cap, it's still possible to remove the oil filter with the hose in place, however it's easy to unclip the intake hose moving it out of the way and serves as a reminder to also empty the catch can.

View attachment 5486

View attachment 5487

View attachment 5488

View attachment 5489
I like the 90 degree fittings, makes for a cleaner look. I just ordered the same setup. Thanks for the info!
 

TurboS , BRVOL, LethalJoe​

Thanks for the updates on this. I am close to ordering. I am focusing on the single valve can solution.

I have been doing a bit of net guided research. From all I have read As long as you empty the can, beware of cold weather. This will extend performance and engine life, and is recommended for direct injection.
Any input would be appreciated.
 
Last edited:

TurboS , BRVOL, LethalJoe​

Thanks for the updates on this. I am close to ordering. I am focusing on the single valve can solution.

I have been doing a bit of net guided research. From all I have read As long as you empty the can, beware of cold weather. This will extend performance and engine life, and is recommended for direct injection.
any input would be appreciated.
I haven't driven my Bronco Raptor since install (winter storage) however, my Porsche is also a twin turbo with direct injection and in the Porsche recommended oil change procedure it includes pulling the lower intercooler hoses (twin intercoolers) to drain gathered oil and there is aways a small amount of oil that drains out similar to Lethal Performances video in this thread. Based on this experience, video's in this thread, and ease of draining while standing up vs. laying on my back with the Porsche it was a easy decision for myself.
 

TurboS , BRVOL, LethalJoe​

Thanks for the updates on this. I am close to ordering. I am focusing on the single valve can solution.

I have been doing a bit of net guided research. From all I have read As long as you empty the can, beware of cold weather. This will extend performance and engine life, and is recommended for direct injection.
any input would be appreciated.
How does the cold weather affect the catch can Operation?
 
How does the cold weather affect the catch can Operation?
I can't answer this as of yet but eventually. I may also be dealing with this seeing how it is snowing while I am writing this.

I just wanted to add that I also installed the single system catch can and followed TurboS install almost exactly. I bought the same 90° connectors, and the 7/8" hose clip. I would still like to get the little circular hold down knob, his is nice.

What I'm not sure about is the mounting hardware. No matter how much I tried I couldn't get the supplied hardware to tighten to my liking to hold the catch can bracket where it wouldn't move. It physically only mounts with one bolt. So I used a 3/8" SS Bolt and Locking nut and was able to get results I was very happy with. I didn't drill anything. Just what I ran into, anyway. See pics.

20230310_201707.jpg


20230310_202133.jpg
 
I can't answer this as of yet but eventually. I may also be dealing with this seeing how it is snowing while I am writing this.

I just wanted to add that I also installed the single system catch can and followed TurboS install almost exactly. I bought the same 90° connectors, and the 7/8" hose clip. I would still like to get the little circular hold down knob, his is nice.

What I'm not sure about is the mounting hardware. No matter how much I tried I couldn't get the supplied hardware to tighten to my liking to hold the catch can bracket where it wouldn't move. It physically only mounts with one bolt. So I used a 3/8" SS Bolt and Locking nut and was able to get results I was very happy with. I didn't drill anything. Just what I ran into, anyway. See pics.

View attachment 6690

View attachment 6691
I had to loosen the battery hold down to slightly slide the battery towards the rear, then was able to insert the supplied round headed bolt in with the nut on the outside of the battery bracket. It's very tight, would be easier to remove the battery but that seemed like to much trouble. Just make sure your mounting bolt can't rub against the battery insulation and eventually puncture the battery.
If not for your T-handle release knob I would have that you took a picture of my installation. (y)
 
I have to loosen the battery hold down to slightly slide the battery towards the rear, then was able to insert the supplied round headed bolt in with the nut on the outside of the battery bracket. It's very tight, would be easier to remove the battery but that seemed like to much trouble. Just make sure your mounting bolt can't rub against the battery insulation and eventually puncture the battery.
If not for your T-handle release knob I would have that you took a picture of my installation. (y)
I will double check one more time tomorrow to err on caution. If necessary, I will add a piece of 1/8" adhesive rubber over the locking nut. For some reason I was thinking that little 2 x 3 section protruded out and would be perfectly safe though. It's hard to tell in the picture but I was pretty sure the nut was still a 1/8" away from the battery wrap. I'LL see...

A compliment is highly expressed when one copies what they did. You did a first class job!
 
As far as I understand, the catch can needs to emptied when it freezes. I have no real experiance with the this just what I have read on the Internet.

Thanks, for the all the helpful information. So glad I joined the form.
 
Update: I had clearance however for a little more than 10 minutes work it was no big deal to change. I like to play safely also.
Using TurboS recommendation, I inserted the 3/8" mounting bolt from the battery side out. This gave me a little more clearance and I won't have any worries of the battery coming in contact with it.
My catch can mount is super secure with no movement!

20230311_150652.jpg
 
Installed the UPR single valve oil catch can, and after trying numerous hose routings, fittings, and orientation I decided to share my findings. The UPR recommended Catch Can location and mounting hole offers the best clearance and serviceability. I did however, need to remove the 4 silver set screws in the top that hold the catch can to the bracket and rotate the can so that the outlet was close to the battery. This orientation keeps the hoses somewhat parallel, tucked lower, and maintains the factory clearance to the hood insulation. This routing also prevents the catch can hoses from contacting the air intake tubing to avoid the possiblity of transferring increased temps to the intake tubing. When I routed the hoses over the top of the air intake tubes it left minimal clearance to the bottom of the hood insulation pad. I also purchased 2 additional 5/8" x 90 degree quick release fittings H5032-88 from UPR for ease of hose routing replacing the 2 45 degree fittings that came on the hoses in my kit. Note that you can twist the hoses once installed to assist them in naturally laying in the desired position. Since the inlet hose was near the fan shroud I added a 1" wire loom clip retainer into the existing 1/4" hole in the shroud, this provides a little additional support to the hose and catch can. This routing does have the intake hose over the oil filter cap, it's still possible to remove the oil filter with the hose in place, however it's easy to unclip the intake hose moving it out of the way and serves as a reminder to also empty the catch can.

View attachment 5486

View attachment 5487

View attachment 5488

View attachment 5489
Do you have 90 degree fittings on all 4 connectors? Thanks!
 
Do you have 90 degree fittings on all 4 connectors? Thanks!
Yes, mine came with 2 90's and 2 45's, therefore needed to order the 2 additional 90's. I hadn't mentioned it before, but prior to ordering the additional 2 90's, I spoke with Steve at UPR for confirmation that using the 4 90's would not effect efficiency. Steve agreed that functional efficiency should Not be effected.
5/8" x 90 degree quick release fittings H5032-88 from UPR
Thanks for the info.
 
How does the cold weather affect the catch can Operation?
As crazy as it sounds, the oil mist and content caught by the catch can, during freezing conditions, can freeze up and damage the catch can due to expansion, similar to if you left a water or soda can out in freezing temps.

While the UPR Catch can is a high quality, billet aluminum construction, they aren't indestructible. Obviously if you're somewhere where it doesn't reach below freezing, you're good to go. But if you encounter some freezing weather, just gotta keep a closer eye on it.
Thank you, in other words the catch can is extracting all moisture, oil and water vapors.
 
Installed my UPR catch can today. I used my own bolt and a zip tie that snaps into the fan shroud to help with a cleaner look.
 

Attachments

  • 24BF725E-6A09-447E-BF92-0E72D4EAF1FB.jpeg
    24BF725E-6A09-447E-BF92-0E72D4EAF1FB.jpeg
    414.3 KB · Views: 79
  • 91DB737F-F412-4D1A-A28C-59B2FAF378DD.jpeg
    91DB737F-F412-4D1A-A28C-59B2FAF378DD.jpeg
    177.2 KB · Views: 78
  • EC3D084C-8384-478E-9F66-6AA9C3106A5A.jpeg
    EC3D084C-8384-478E-9F66-6AA9C3106A5A.jpeg
    408.8 KB · Views: 76
  • EE04FE90-F7D2-460B-A6A6-69E86FA23F86.jpeg
    EE04FE90-F7D2-460B-A6A6-69E86FA23F86.jpeg
    247.5 KB · Views: 75
  • D1891911-5AE9-4764-87A1-EB7388428AB5.jpeg
    D1891911-5AE9-4764-87A1-EB7388428AB5.jpeg
    246 KB · Views: 72
  • 57DDE527-D5DA-48E7-9217-9EA625996509.jpeg
    57DDE527-D5DA-48E7-9217-9EA625996509.jpeg
    365.1 KB · Views: 79
  • 96DD1EE4-05A5-48EB-8E25-70A72F482058.jpeg
    96DD1EE4-05A5-48EB-8E25-70A72F482058.jpeg
    397.2 KB · Views: 73
  • 00E31352-5E86-42AD-95D5-8745230D0348.jpeg
    00E31352-5E86-42AD-95D5-8745230D0348.jpeg
    88.3 KB · Views: 76
Installed my UPR catch can today. I used my own bolt and a zip tie that snaps into the fan shroud to help with a cleaner look.
That's a really sweet job right there BRVOL!!!. I was back and forth from the 90° to the 45° fitting for the valve pan cover side. I ended up using the 90° but fully understand why you left the 45° there.

The cover on your battery, where did you find something like this?
 
That's a really sweet job right there BRVOL!!!. I was back and forth from the 90° to the 45° fitting for the valve pan cover side. I ended up using the 90° but fully understand why you left the 45° there.
Thanks! I took the advise of UPR when I ordered mine. I was a little worried it might need a 90 degree there but it worked out and I'm happy with it. The bolt made a huge difference as well. It was such a tight fit for an allen head screw.
 
What is the difference in the bolt you used vs what comes with the kit?
 

Top Member Reactions

Back
Top