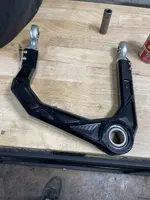
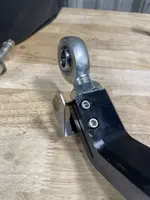
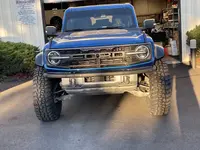
What did you do to your Bronco Raptor today?

I have the rtr with 39 ko2s and it is about the same weight as the stock beadlock capable and 37 ko2s. ko2s are actually one of the lightest tires in their size. I have no issue taking off/ putting on my spare. its actually lighter than i thought it would be. I do live in the gym though :)
How's that new Exp-One bumper coming along? I was up in Ogden talking to James a couple weeks ago. Interesting conversation.
 
It looks amazing! How's the road noise with these tires?
Not bad at all actually for what they are
They make about the same amount of noise as the hard top

Both of which are easily canceled out by turning the radio up just to about 8 to 12
I don’t see what most people complain about, I mean, you’re basically driving a brick down the highway at 80 mph

It’s not gonna be dead quiet like a German luxury sedan 🤣
 
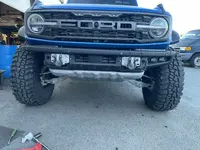
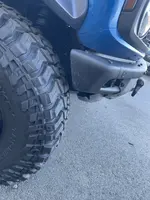
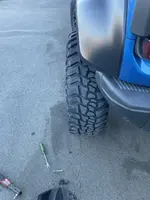
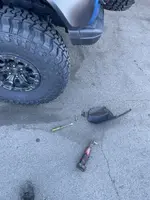
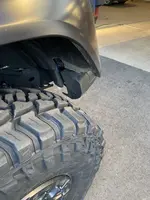
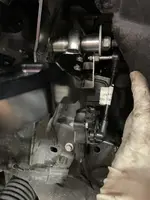
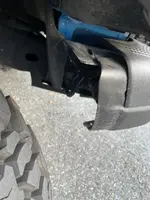
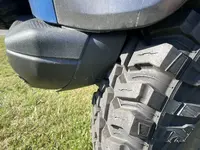
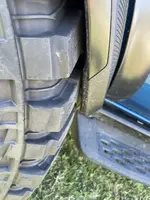
Mud flap / fog light delete
 

Attachments

  • IMG_1438.jpeg
    IMG_1438.jpeg
    353.3 KB · Views: 55
  • IMG_1436.jpeg
    IMG_1436.jpeg
    420.3 KB · Views: 55
  • IMG_1435.jpeg
    IMG_1435.jpeg
    232.3 KB · Views: 51
  • IMG_1433.jpeg
    IMG_1433.jpeg
    242.8 KB · Views: 54
  • IMG_1432.jpeg
    IMG_1432.jpeg
    309.6 KB · Views: 52
  • IMG_1441.jpeg
    IMG_1441.jpeg
    213.5 KB · Views: 55
  • Thread Starter
  • Thread starter
  • #805
Not bad at all actually for what they are
They make about the same amount of noise as the hard top

Both of which are easily canceled out by turning the radio up just to about 8 to 12
I don’t see what most people complain about, I mean, you’re basically driving a brick down the highway at 80 mph

It’s not gonna be dead quiet like a German luxury sedan 🤣
I still have PTSD from a set of Nitto Mud Grapplers that I had. You could hear me coming from a mile away with those things haha!
 
How's that new Exp-One bumper coming along? I was up in Ogden talking to James a couple weeks ago. Interesting conversation.
What did they have to say?

And you mean this :) Doing a couple adjustments right now (bolts are all loose- swing arm out of way) will post full pics shortly.
IMG_0207.jpeg
 
  • Thread Starter
  • Thread starter
  • #807
What did they have to say?

And you mean this :) Doing a couple adjustments right now (bolts are all loose- swing arm out of way) will post full pics shortly.
View attachment 10604
Don't hold out on us, let's see some pics! :cool:
 
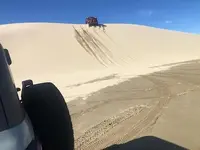
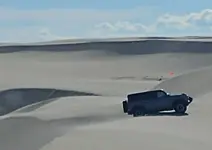
Killpecker Sand Dunes, North of Rock Springs, WY. BFG KO2 tires did great at 15 psig. Those stock Goodyear tires on the Badlands/Sas was another story. Could be 3.0L vs 2.7L also.
77023.jpeg
1024231350c~2.jpg
1024231059.jpg
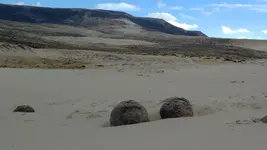
5 ft dia rock "marbles"
 
  • Thread Starter
  • Thread starter
  • #810
Installed HammerBuilt fog light bracket with 8 Baja Designs yellow fog lights. Got caught in pea soup last weekend down at the coast with the Rigid lights and couldn't see anything. Looking forward to seeing what this will do.
 
4x4truckleds has a specific bracket to attach. I didn't love their wiring harness and ended up doing something different to wire that was more minimal and concealed. Lights are incredible and backlighting I wired to the fog switch, so the backlighting comes on with the headlights and parking lights.
That looks awesome! Do the LP4s block the front camera at all?
 
My replacement OEM rear diff cover arrived yesterday to my Ford dealer, I should receive tomorrow, was on Back Order with Ford since June 2022. I'm guessing the strike at Ford's MAP may have contributed to better parts availability for us. I'm excited to get started modifying/beautifying.
 
Was also able to test more flexing on the 40’s with 3” perch collers
Front seemed ok after fog light delete and bumper corner removal

Rear was hitting the plastic corner cover, ripped 1 side off at gas station
Seemed to give me about 2” more
But need to tuck up the wire (parking sensor?)there as not to get snagged

I also plan on cleaning it up and making a little cover
To make it slightly more aesthetic 🤷‍♂️🤣
 

Attachments

  • IMG_1553.jpeg
    IMG_1553.jpeg
    189.4 KB · Views: 32
  • IMG_1539.jpeg
    IMG_1539.jpeg
    401.3 KB · Views: 32
  • IMG_1540.jpeg
    IMG_1540.jpeg
    183.7 KB · Views: 31
  • IMG_1542.mov
    16.6 MB
Last edited:
IMG_0238.jpeg
IMG_0239.jpeg
Expedition One rear bumper and swing arm installed. I had the treadate powdercoated black vs leaving it aluminum. Used black hardware as well. Going to have the cap annodozed black as well. 3rd brake light not mounted yet as im working on a custom chaselight setup with it.
 
View attachment 10700View attachment 10701Expedition One rear bumper and swing arm installed. I had the treadate powdercoated black vs leaving it aluminum. Used black hardware as well. Going to have the cap annodozed black as well. 3rd brake light not mounted yet as im working on a custom chaselight setup with it.
I had Expedition one front bumper, sliders and rear bumper with swing arm on my FJ Cruiser. Great products!
 
I went with the Bodyguard bumpers front and rear. To me they are the best looking bumpers around for the Raptor. I put the dual Ford Performance rigid lights at the mirrors and am still in the process of wiring up the front and rear bumper and lights and the bull bar light.View attachment 9943View attachment 9944View attachment 9945
I noticed you have the spare tire/wheel 3rd brake light installed.
I installed one on my wifes Bronco Badlands and it simply plugged into the OEM 3rd brake light harness connector within the 3rd brake light housing.
On the Raptor, did it also plug into the OEM 3rd brake light harness connector? I'm curious if it's the same plug as the regular Bronco.
If so, is it illuminated when the running lights are on like our OEM light above the spare or does it only illuminate when brake lights are activated?
 
It's been a while since this thread had something new and I'm way overdue for this project so why not get it done on a nice fall friday morning. Some time ago I posted my new Strands Siberia Qube Pod Light installation with the promise that more was to come.

I had initially ordered a curved Diode Dynamics 30" Light bar but wasn't really pleased with the fitment as the curvature of the bar was more aggressive than that of the bumper. It also meant that the bar would stick out in front of the bumper a good 2-3 inches, which I also wasn't very keen on. That fitment was a function of both the curvature and depth of the bar itself as well as the available mounting brackets. So I set my sights on finding the best combination of mounting solutions as well as lighting options that provided really good forward lighting while also being as flush as possible to the front of the bumper. What I came up with was a combination of brackets from 4x4TruckLEDs along with the Strands Siberia Single Row 32" Light Bar. I really like the amber light bar function from both the Pods and the Lightbar itself. Since the amber headlamp feature flickers when taking the photos you don't see in these pictures how well they work together but it creates a really good appearance. I looked at other options that provide a similar backlit 'bar' look but I wanted better overall driving light performance and not a fan of the "dotted-line" look that you see with a competitive product.

1700239487722.png


1700239567335.png


I'll need to get more pictures after dark to get a better idea of their performance but for now I'm quite pleased with them. Here's a general overview of the install as it's pretty straightforward, going to focus more on the specific bracket/light setup rather than the install itself. The reality is that getting the brackets as I wanted them was the most difficult part of the process, followed by fishing the cable extension through the engine bay.

Brackets:
As mentioned I really wanted something to sit as flush as possible to the front of the bumper. Almost every mounting solution I found has the lights sitting well in front of the bumper, which makes sense as most lights are too deep to sit flush (including traditional round lights). I ended up purchasing the KR Offroad Brackets from 4x4TruckLEDs and cutting off a section then sanding and adding a few coats of matte black Rustoleum paint. I also added some 2-sided gorilla tape on the inside section to prevent scratches.

Brackets as-ordered:
1700239929813.png


Modified Brackets:
1700240073492.png


1700240086161.png


DT4 Extension:
As the wire harness from the light is only about 20in long and has a DT4 connector, I ordered the DT4 Extension Wire from DD in 3M to give me all of the length needed to run to the Upfitter wiring under the hood. It was a pretty straightforward run from the front bumper through the wheel well and up in front of the battery. From there I zip-tied along the fender edge with some other accessory wiring and cut to length, etc. The only trick for me was accessing the underside of the engine bay to run the harness up. I simply turned the wheels facing hard left/driver, undid a single clip to pull the fender liner back and got to work.

1700240762415.png


Light Installation:
From there is was pretty straightforward to install the mounts and get the light in place. The trick is that this light is ~32" wide and the brackets give at best 31" to work with. So when I had modified the brackets before I had to bend them every so slightly to make enough room for them to fit. For the light installation in put the brackets in place on the bumper first to ~80% tightness, then put the lightbar in place with each end bolt inserted ~50% just to get everything in place and lined up. From there I tightened each end of the bar gradually to maintain balance on both sides and finally tightened the Bumper Bolts as much as I could. I'll be going back and checking them periodically and might consider some blue locktite in the future.

Here you can see how flush it sits to the bumper and seems to be a pretty clean install. Additionally no blockage of the front camera and I didn't have to shove the wire harness behind the grille surround as the setup gave just enough room between the light and the surround to sit down snug.

1700240884984.png

1700240903219.png

1700240918664.png
 
Last edited:

Top Member Reactions

Back
Top